This entry guides you through the steps to run your migrated Repertoire 8.x or Ambience 4.x jobs using the ETL Module in Ambience/Repertoire 202x.
If your Jobs has any tasks that reads a file or outputs a file, do go through this guide from Step 1. Else, you may proceed to Step 3.
- In your etc/application.conf file, add the following code fragment:
*Do add in the necessary paths as required based on your Jobs created.
For example, the path “C:/outputFolder” is added as the job is configured to output a file in that directory.
elixir.data.ds {
  # Only files within these directories (and sub directories) are readable and writable by the File Steps.
  # You could use "/" or "C:/" or equivalent to allow access to all files and folders, but restricting the
  # scope to certain folders is preferred. Relative paths are relative to the installation root folder
  readable: ["./data/in", "./data/out"]
  writable: ["./data/out", "C:/outputFolder"]
}
-
Restart your Ambience/Repertoire 202x server.
-
Ensure that you have migrated over the necessary Jobs into the Ambience/Repertoire 202x repository.
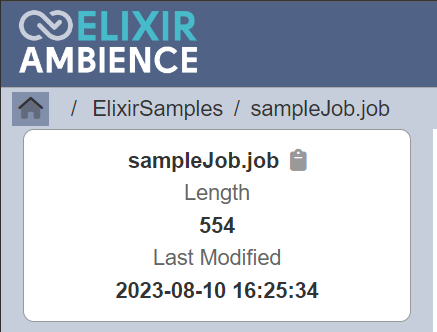
- A sample job file as well as the composite data source linked to that job has been attached
here for your reference.- Please park the above 2 files under /ElixirSamples
- The sample job would generate a set of records based on FruitSales.ds and streams it onto a csv file which will be output in the following directory, “C:/outputFolder”
-
From Service Chooser, select the ETL module and proceed to add a new chainset.
-
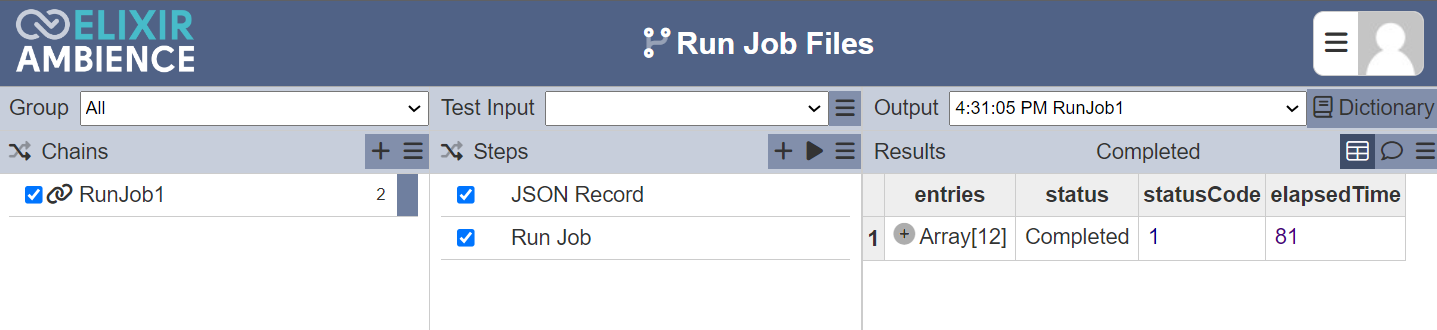
Next, add a new chain (i.e." RunJob1") and add the following steps (i.e. “JSON Record”, “Run Job”) to the chain.
-
In the step “JSON Record”, create a new variable (i.e. “job”) to point to the job file parked over in the Repository module.
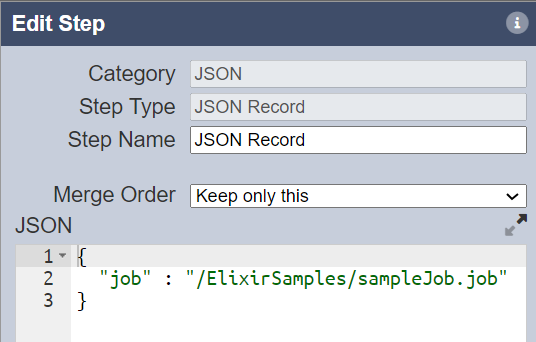


- To easily copy the full path of your job file, navigate to the repository module → locate the job file → click the clipboard icon beside the job file name.
-
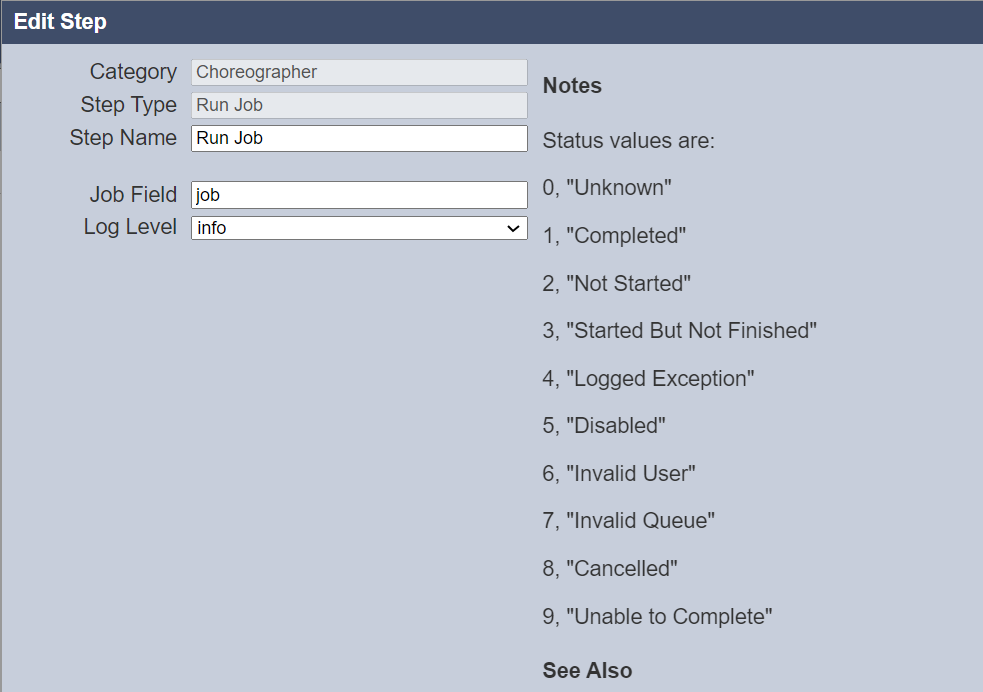
In the step “Run Job”, input the variable (i.e. “job”) which was configured in the previous step as the input for the parameter “Job Field”.
-
Select the desired logging level and click Save. To run the ETL chain, select the “play” button found in the Steps column.
-
If successful, you will be able to see a statusCode of “1”.

- The different status codes could be found under the Notes section of the Run Job step when further expanded.
- To connect Ambience 202x to the Repertoire designer, please refer to the following support entry: Using the Repertoire Designer with Ambience 2022 & above