A simple guide to “Getting Started: DOCX Report Template”.
Contents:
- Creating a basic DOCX report template.
- Mapping a Datasource.
- Sorting & Grouping.
- Adding Group Headers.
- Populating the Report Template.
- Propagating Parameters.
- Adding an Alias.
- Implementing Aggregate Functions.
- RenderIf.
Creating a basic DOCX report template
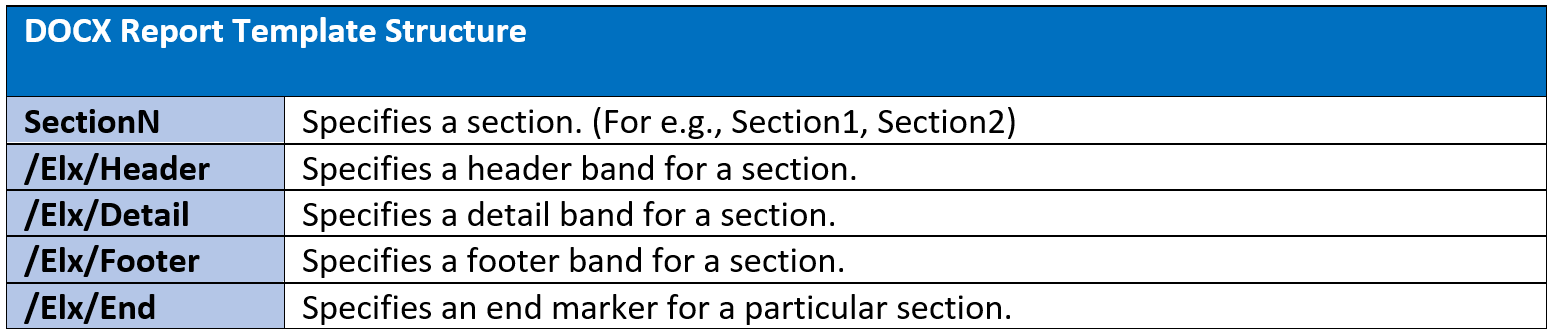
A basic .DOCX report template is divided into reporting bands using comment markers which can be added by going to Review Tab → “New Comment”. [varies based on MS- Word version]
Create a new .docx document
(For example, sample.docx)Add 5 different comment markers containing (Section 1, /Elx/Header, /Elx/Footer, /Elx/End) respectively as shown below.
Save the .docx template.

Notes:
- Comment markers define the reporting band according to the report template format.
- Add additional Header & Footer accordingly.
- Users are able to define as many “header” & “footer” based on their groupings.
Mapping a Datasource
Datasource mappings are declared before the first comment marker.
- In sample.docx template, paste in the path to the datasource (i.e. FruitSales.ds) to the top of the .docx document before the comment markers.
For example,
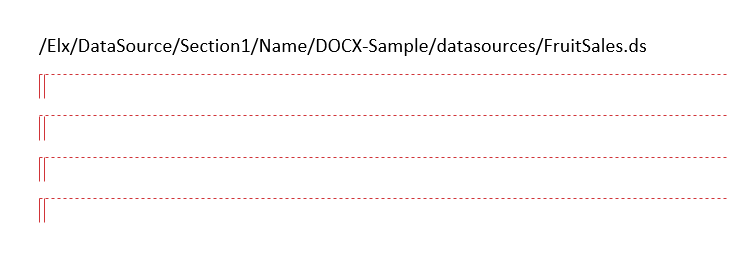
Notes:
- Structure of datasource mapping, using the example above:

Sorting & Grouping
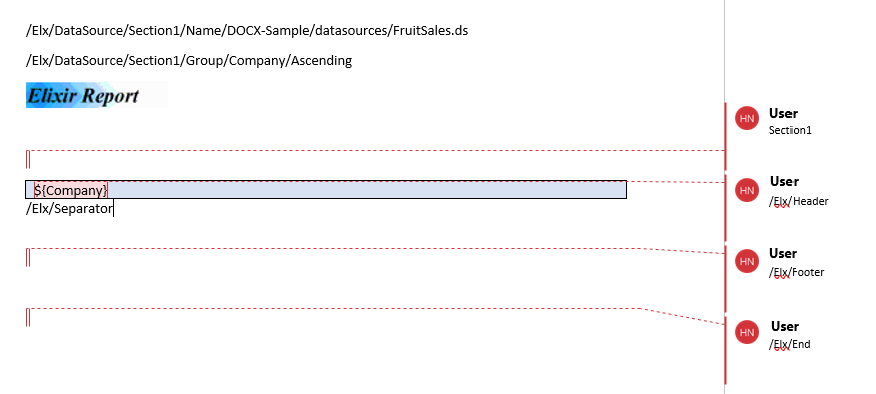
Sortings & Groupings are declared before the first comment marker.We’ll be sorting based on the “Company” column found in the FruitSales.ds
- In sample.docx template, append the following line below the datasource declaration.
"Elx/DataSource/Section1/Group/Company/Ascending"
For example,

Notes:
- The line above defines that the datasource mapped to Section 1 will group the “Company” column in ascending order.
Adding Group Headers
Adding title headers for the report.
- In sample.docx template, add in a single table row for “Elx/Header” followed by a “/Elx/Separator”.
For example,
“Company” will be used as the title header for the example above.
Populating the Report Template
Adding in detail band to populate the reoport template with data from the data source.
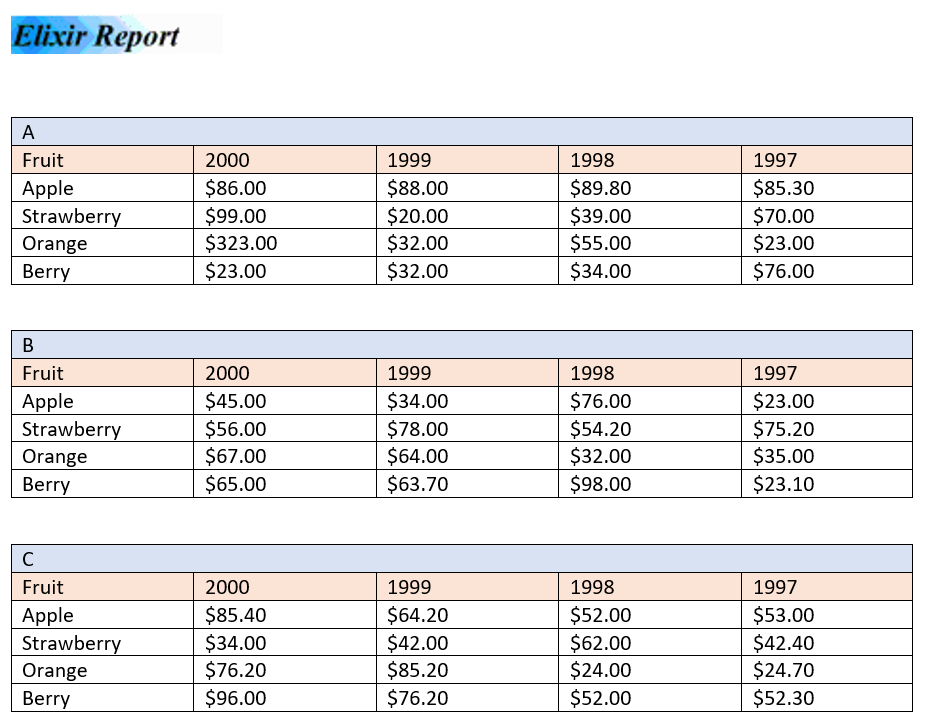
- In sample.docx template, add in a table after the fourth header and input in the desired column names from “FruitSales.ds”
For example,
- The data for the year 2000, 1999. 1998 & 1997 are formatted to be output as $x.xx
- Save the .docx template & render the DOCX template up on the designer module.
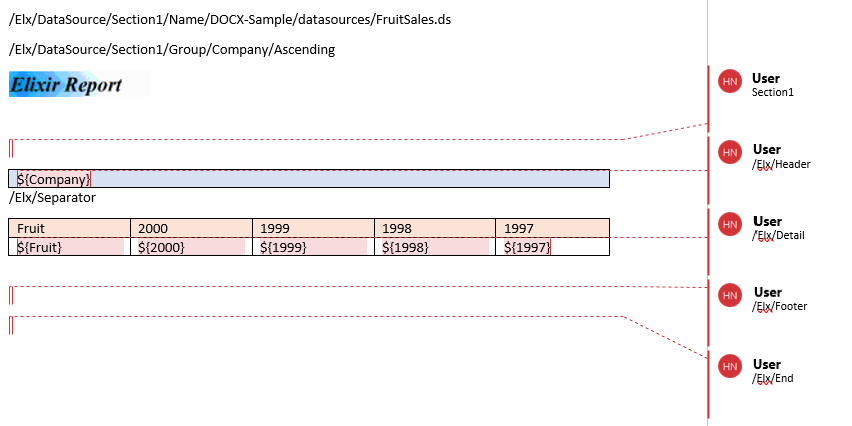
Output:
Propagating Parameters
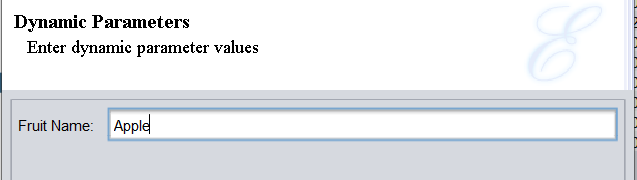
Used when the datasource requires a parameter.We’ll be prompting users for the desired Fruits as the parameter.
- Duplicate the .docx template (e.g. sample02.docx) & append the following line below the Sorting & Grouping declaration.
“/Elx/DataSource/Section1/Parameter/Fruit Name/${Fruit Name##}”
“/Elx/Parameter/Fruit Name/${Fruit Name##Apple}”
- Save the docx template & render the DOCX template up on the designer module.
Notes:

Output:
- Upon rendering, users will be prompted for a Fruit Name.
- The default parmeter (i.e. Apple) is shown as assigned above.

Adding an Alias
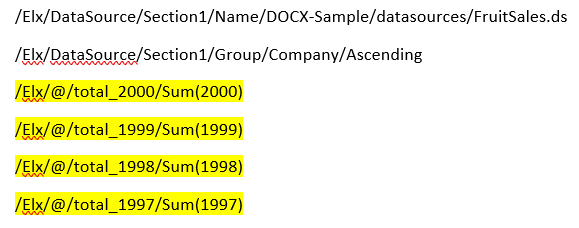
Used when data parameters are too long (e.g. If Else Statements)We’ll be defining an alias for an aggregate function. (Total Sum)
- In sample.docx template, append the following lines below the Sorting & Grouping declaration.
/Elx/@/total_2000/Sum(2000)
/Elx/@/total_1999/Sum(1999)
/Elx/@/total_1998/Sum(1998)	/Elx/@/total_1997/Sum(1997)
For example,
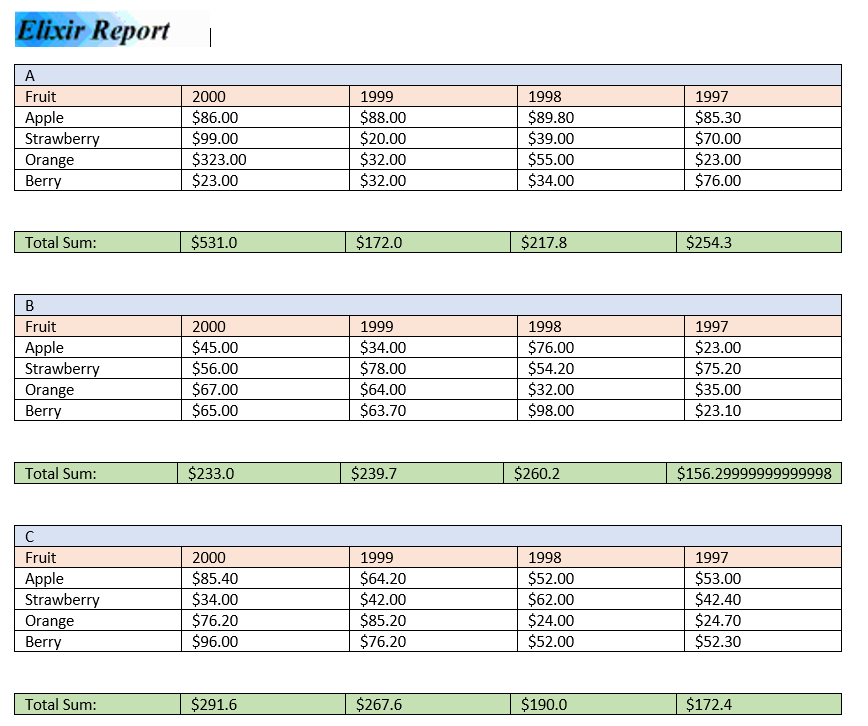
- Under “/Elx/Footer”, add in a table row with the following details as shown below.
Notes:

Output:
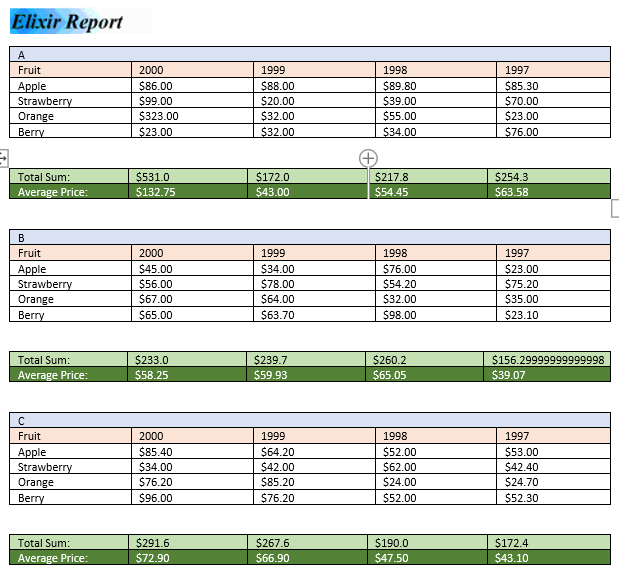
Implementing Aggregate Functions
We’ll be implementing an aggregate function to calculate the average price of the fruits for the years 2000, 1999, 1998, 1997.
- In the sample.docx template, add another row under “”/Elx/Footer" with the following details:
- Save the DOCX template and render it out.
Output:
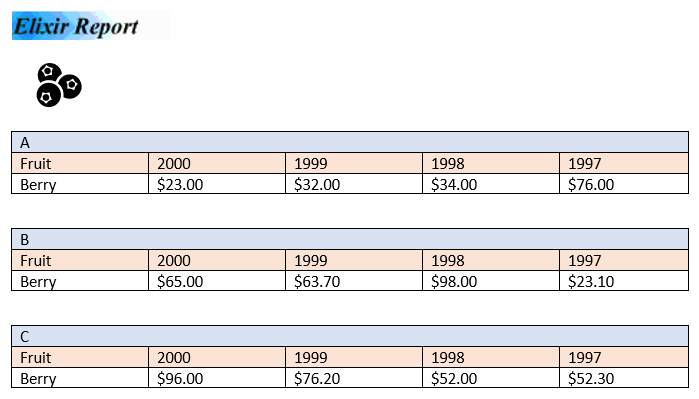
RenderIf
The image icon renders based on the parameter (i.e. Fruit Name) that is given upon render.
In sample02.docx sample, add the following 4 image icons below the comment marker for “Section1”.
Icons can be found by searching it over at Insert → Icons in Microsoft Word. (i.e. Apple, Strawberry, Orange, Berry)Add a comment for each of the fruit image icon with the following comment accordingly:
/Elx/RenderIf Fruit=="Apple"
/Elx/RenderIf Fruit==”Strawberry”
/Elx/RenderIf Fruit==”Orange”
/Elx/RenderIf Fruit==”Berry”
- Save the DOCX template & render the template.

Output:
Before Implementing RenderIf:

After Implenting RenderIf:
[“Berry” icon will be shown when the parameter given is “Berry”.]
[If “Apple” is passed in as the parameter, the “Apple” icon will be shown.]
Resources:
resources.zip (67.5 KB)