This support entry explains the 3 different types of Size Mode(s) available when using an Image for your Report template.
Firstly, shown below are the steps to resize your image accordingly.
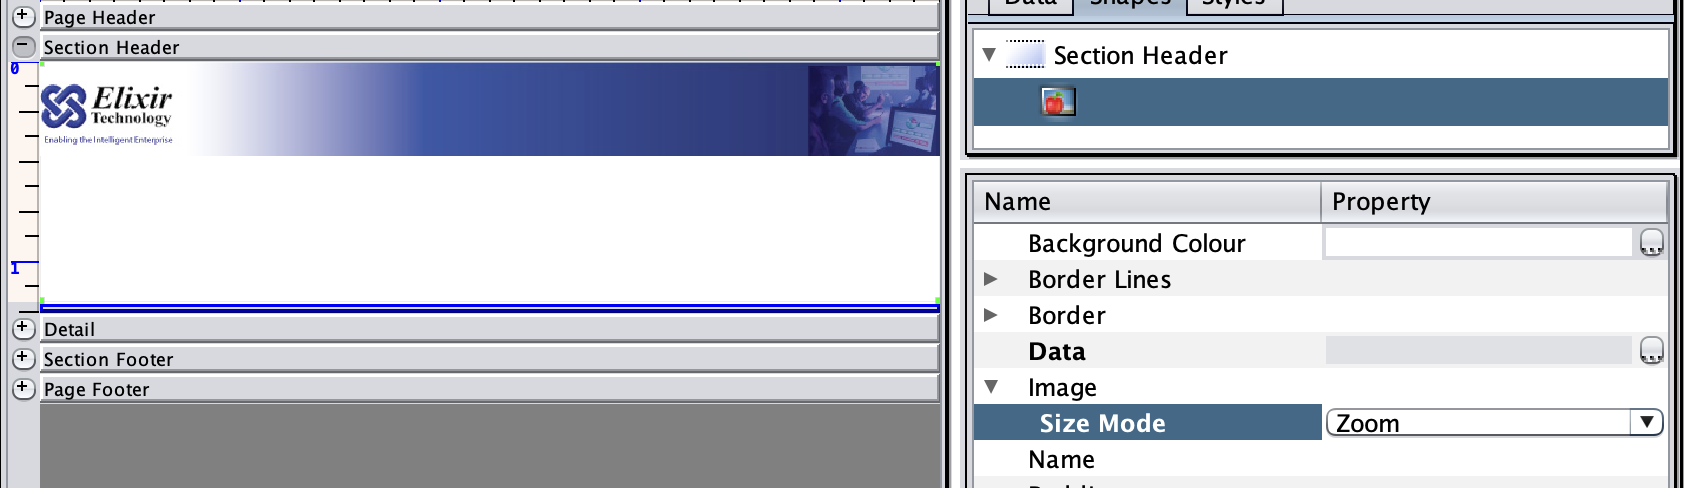
1/ From your Repertoire Designer, click on the report band where the image resides.
2/ In the top-right panel, ensure that the “Shapes” tab is selected.
3/ Click on the Image icon.
4/ In the Property box, expand “Image”.
5/ You should be able to see a dropdown list for “Size Mode”.
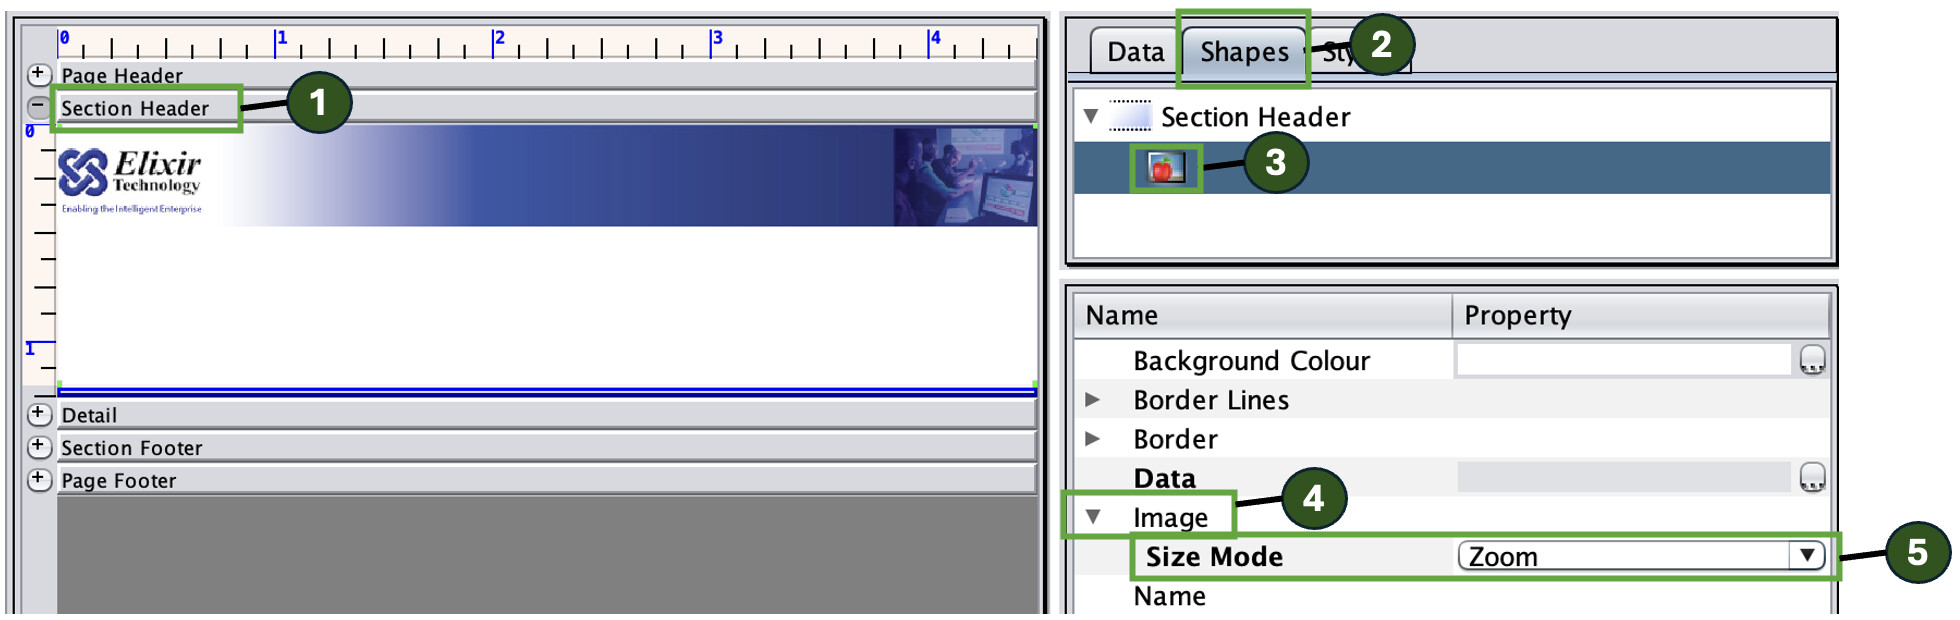
The 3 types of Size Mode available as follows:
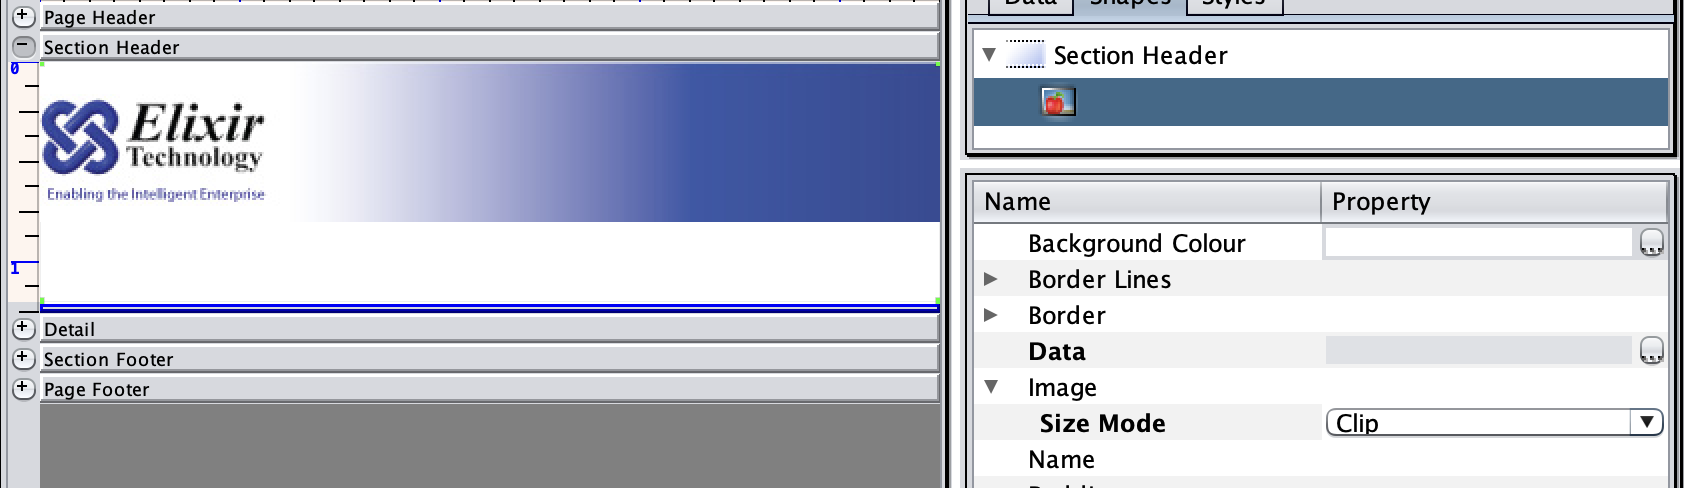
- Clip
-
This is the default image mode. When this mode is selected the image is stretched to fit the specified width and height. If the area(width and height) of the image is greater than that of the image element then the image is fitted in the middle of the specified boundary. Areas that exceed the boundary will be clipped off. If the area of the image is lesser than that of the image element then the image will be fitted in the middle of the specified area.
-
For example,
- Stretch
-
When you want to resize the image this mode is selected. The aspect ratio will not be taken into consideration while resizing the picture. Depending on the size specified the image will either be shrunk or expanded to fit into the specified area. It should be noted that this function works best with larger images. If the area of the image is greater than that of the image element then the image is shrunk to fit the area specified, unlike clip where the image is clipped.
-
When the image area is lesser than that of the image element then the image is expanded to fit the area. If the image element’s area is increased invariably then the image is stretched further to fit into the area and thus loosing its original shape.
-
For example,

- Zoom
-
When you want to Zoom the image this mode has to be selected. The aspect ratio is taken into consideration while resizing the image. If the image area is greater than that of the image element then the image is shrunk to fit into the boundary but it should be noted that not the whole area is filled as the image is shrunk while maintaining the aspect ratio. When the image area is smaller than that of the image element the image is expanded to fit into the boundary but again the whole area is not filled.
-
For example,