Overview
This document outlines the guide to create a chain with the purpose of reading a hardcoded array of JSON objects and write the data into a CSV file that uses a pipe (|) as the delimiter and includes a header row.
Step 1: Create a New ETL Container
Before creating the chain, you will first need to create the main ETL container that will hold it.
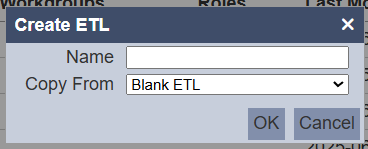
- Select the option to add a new ETL.
- The Create ETL dialog box will appear.
- Enter a descriptive Name for your ETL process (e.g.,
GenerateCSV_JDBC). - Leave the Copy From field set to
Blank ETL. - Click OK.
Step 2: Add a New Chain
Now that you have an ETL container, you must add a chain to it. The chain will contain the actual processing steps.
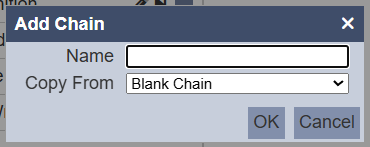
- Inside your newly created ETL, select the option to add a new chain.
- The Add Chain dialog box will appear.
- Enter a Name for your chain (e.g.,
GenerateCSVfile). - Leave the Copy From field set to
Blank Chain. - Click OK.
Step 3: Add and Configure the JDBC Step (Your Data Source)
Next, you need a step to provide the data. We will use the JSON Record step to input a fixed set of data.
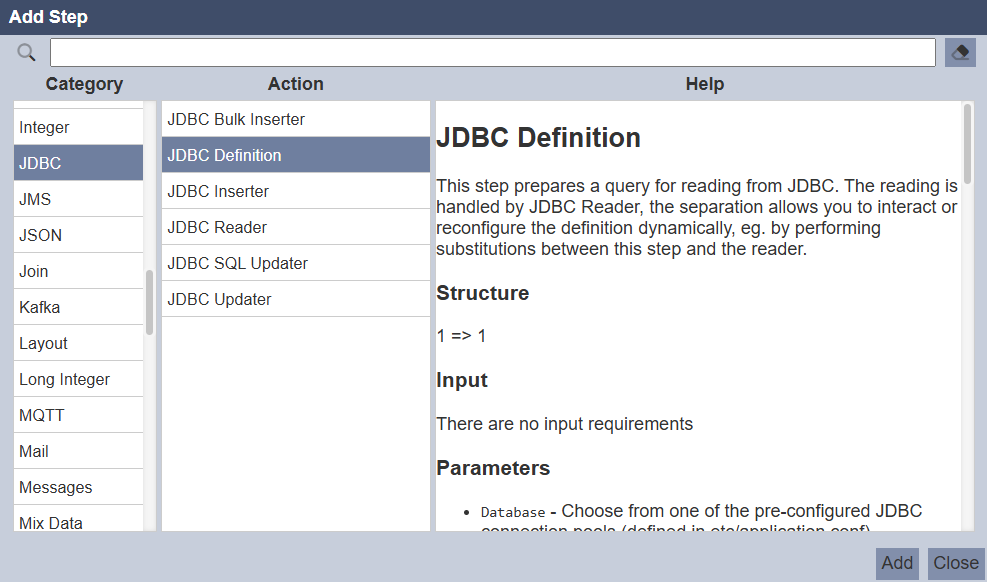
- Add a new step to your chain.
- In the Category list on the left, select
JDBC. - From the Action list that appears in the middle, choose
JDBC Definition.
- Click the Add button to add the step to your chain.
- In the configuration area for this step, configure the following:
- Database: Select the appropriate pool (e.g., mssql)
- SQL Query: Enter the query to retrieve your data
- Save the step.

Step 4: Add and Configure the JDBC Reader Step
This step executes the query and passes the results downstream.
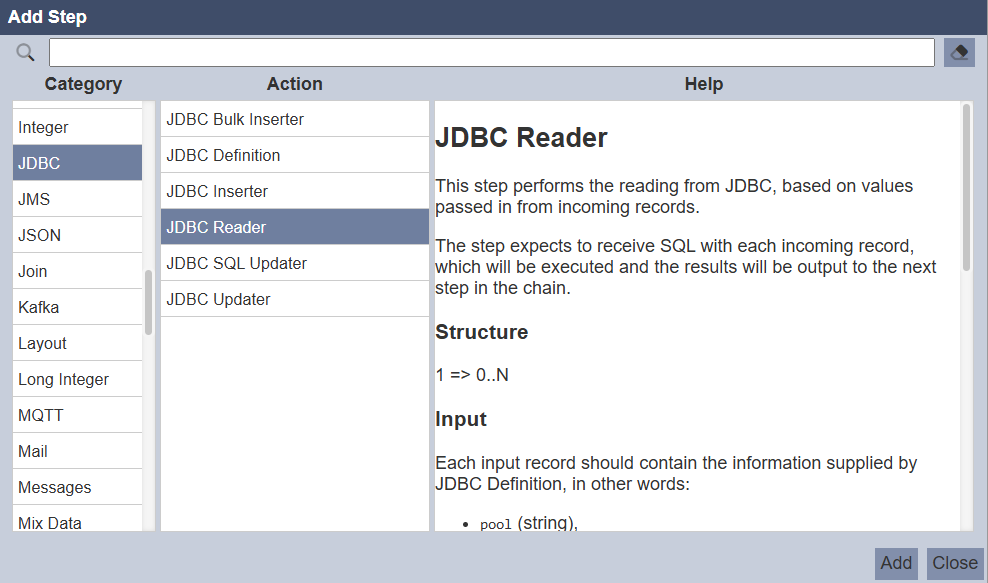
- Add a second step to your chain.
- In the Category list, select
JDBC. - From the Action list, choose
JDBC Reader.
- Click the Add button to add the step to your chain.
- Ensure the step is linked to the previous
JDBC Definitionstep.
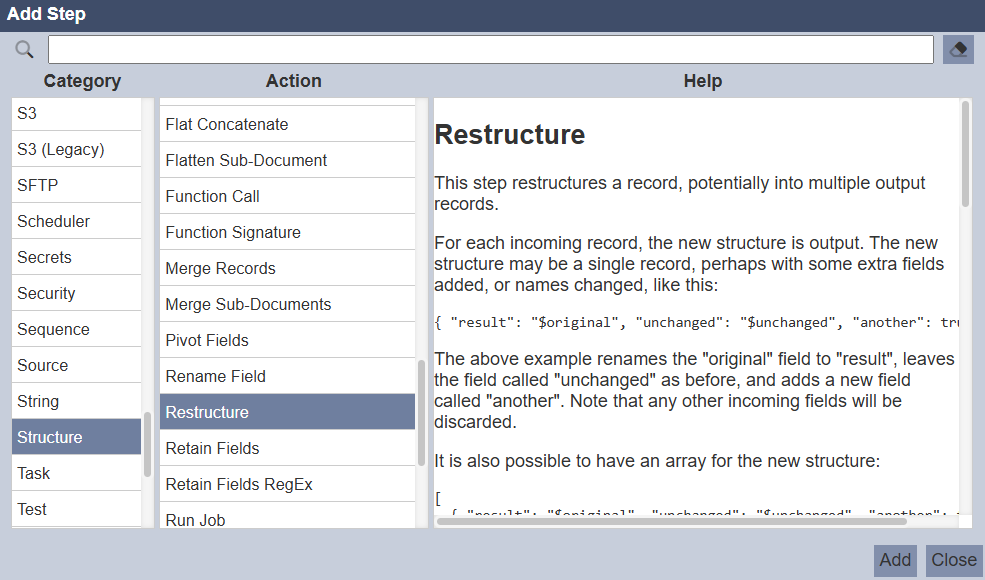
Step 5: (Optional) Add a Restructure Step
If your column names contain lowercase letters or need renaming, add a Restructure step to ensure compatibility with the CSV File Writer.
- Add a new step after the
JDBC Reader. - In the Category list, select Structure.
- From the Action list, choose
Restructure.
- Click the Add button to add the step to your chain.
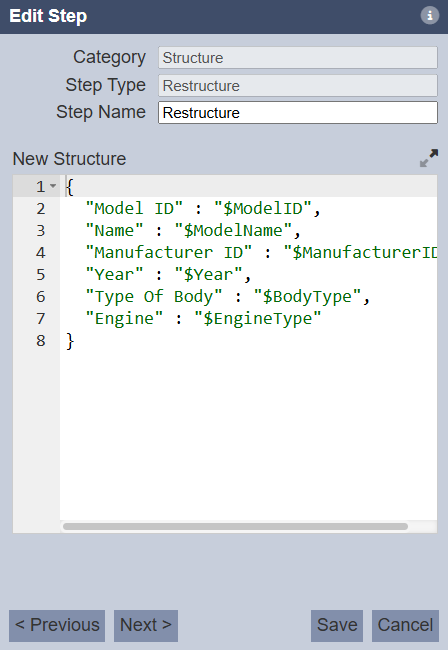
- In the New Structure configuration panel, you need to define the mapping from new column name to the source database name (prefixed with a $), e.g:
{ "Model ID" : "$ModelID", "Name" : "$ModelName", "Manufacturer ID" : "$ManufacturerID", "Year" : "$Year", "Type Of Body" : "$BodyType", "Engine" : "$EngineType" } - Save the step.
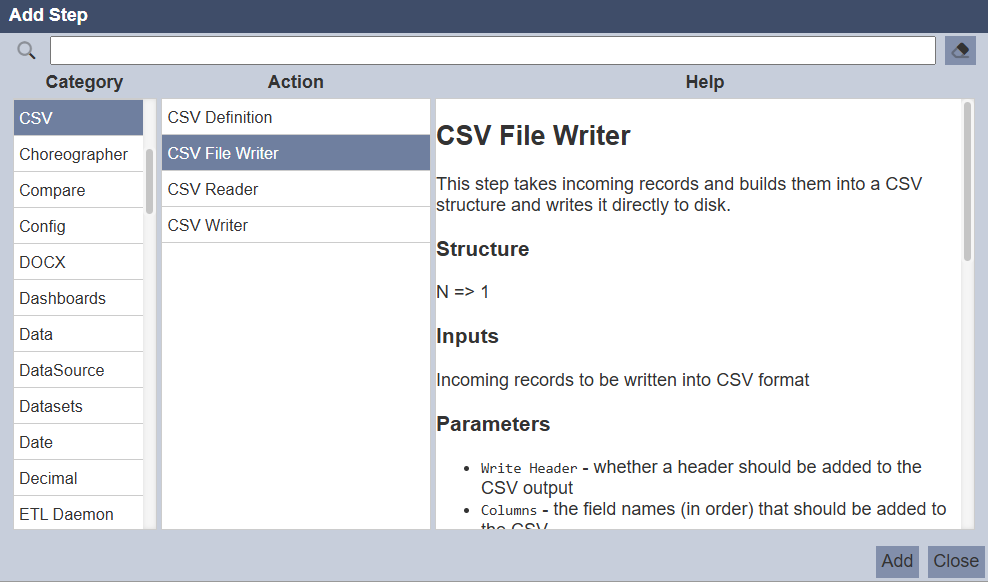
Step 6: Add and Configure the CSV File Writer Step
This step writes the final output file.
- Add a new step to your chain.
- In the Category list, select CSV.
- From the Action list, choose
CSV File Writer.
- Click the Add button to add the step to your chain.
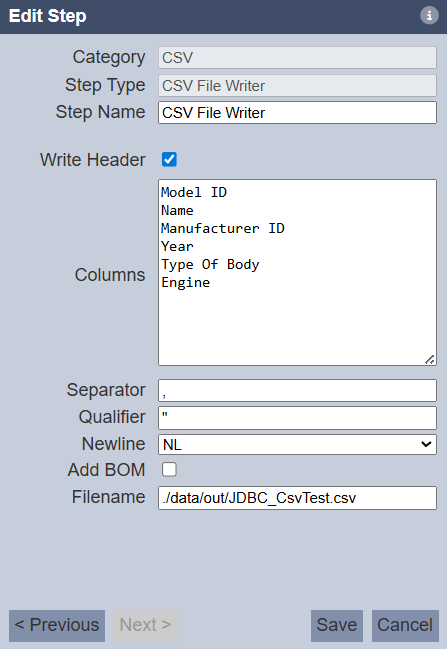
- In the configuration area for this step, configure the following:
- Columns: List the column names exactly as defined in the
Restructurestep, e.g:
Model ID Name Manufacturer ID Year Type Of Body Engine- Filename: Specify the path and name for your output file, for example:
./data/out/JDBC_CsvTest.csv - Columns: List the column names exactly as defined in the
- Save the step.
Step 7: Verify the Output
Run the chain and verify the output file in the specified directory (./data/out/).
Attachments
- Sample Chainset
- Output File
GenerateCSV_JDBC.chainset.zip (1.2 KB)