Overview
This guide explains how to configure a report template in Ambience Designer 4.x / Repertoire Designer 8.x and Repertoire Designer 202x to dynamically offer multiple datasource options. The report template is fully compatible to be rendered in Ambience 202x and Repertoire 202x. Users will be able to render the report with a selectable datasource option, providing flexibility across both environments.
Step 1: Prepare Datasources
Create two datasources, for example:
DataA.dsDataB.ds
Step 2: Create a New Report Template
- Create a new
.rmlfile. - Name the template according to your preference.
Note: Ensure both datasources share similar column names for the fields you intend to retrieve dynamically.
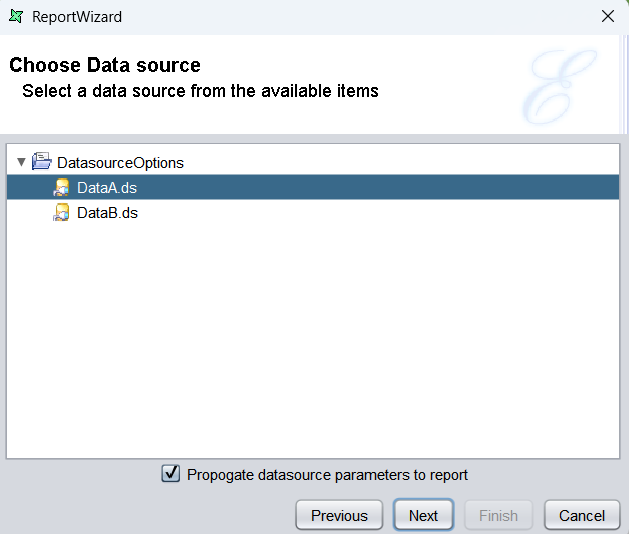
Step 3: Bind the Default Datasource
Bind the newly created .rml to DataA.ds. This will serve as the default datasource for the report.
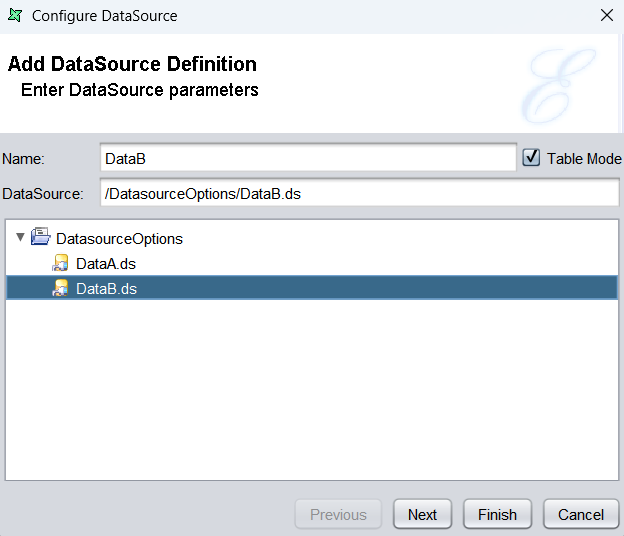
Step 4: Add a Second Datasource
-
Add DataB.ds as a second datasource for the report template. Name the second datasource explicitly as DataB to keep the configuration clear and consistent.
-
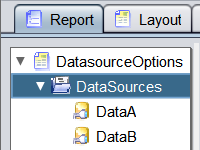
Rename the default datasource to DataA for clarity and consistency.
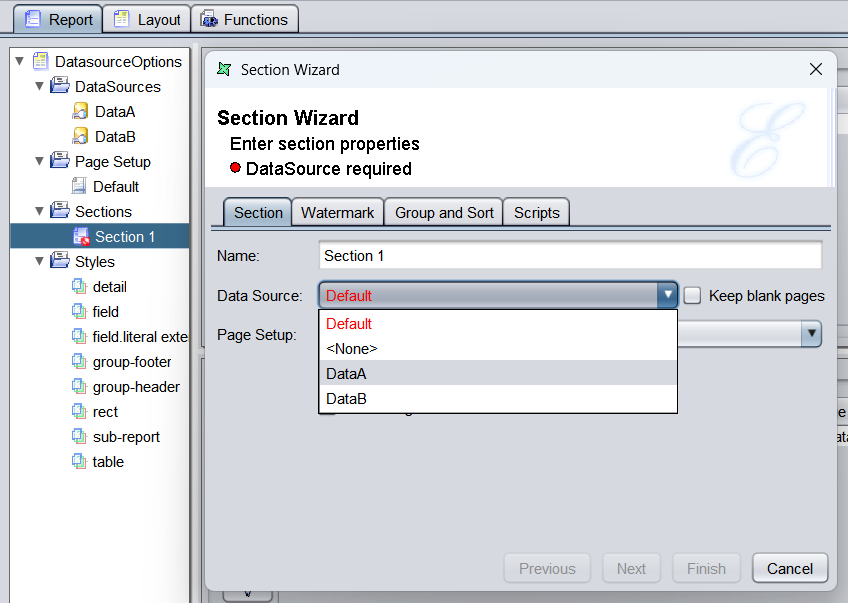
Note: Please check the
Section 1properties. It may still be bound to the oldDefaultdatasource, shown in red. Rebind it to the renamedDataAto ensure proper linkage. -
At this point, the report should contain two datasources: DataA.ds and DataB.ds.
Step 5: Add Runtime Script
Navigate to the Report Properties section.

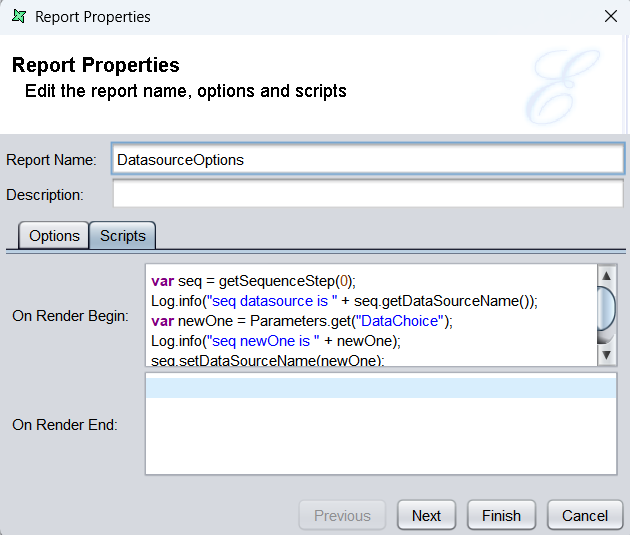
In the Script tab, paste the following snippet in the On Render Begin text field:
var seq = getSequenceStep(0);
Log.info("seq datasource is " + seq.getDataSourceName());
var newOne = Parameters.get("DataChoice");
Log.info("seq newOne is " + newOne);
seq.setDataSourceName(newOne);
Log.info("seq setup complete");
What the Script Does?
- Retrieve Sequence Step: Gets the initial sequence step of the report.
- Parameter Handling: Reads the user-selected value from the
DataChoiceparameter. - Datasource Switching: Updates the sequence step’s datasource to the chosen option.
- Logging: Outputs diagnostic messages for verification.
This enables a single report template to operate against multiple datasources dynamically.
Step 6: Add a Parameter
-
Navigate to the Report tab.
-
In the Parameters section, add a new parameter named DataChoice.
-
Set its value to:
${DataChoice#choice(DataA,DataB)#DataA}This creates a dropdown with two selectable options (DataA and DataB), with DataA as the default.
Note: The datasource names defined in this parameter (
DataA,DataB) must exactly match the names you configured inStep 4. Any mismatch will prevent the report from switching correctly.


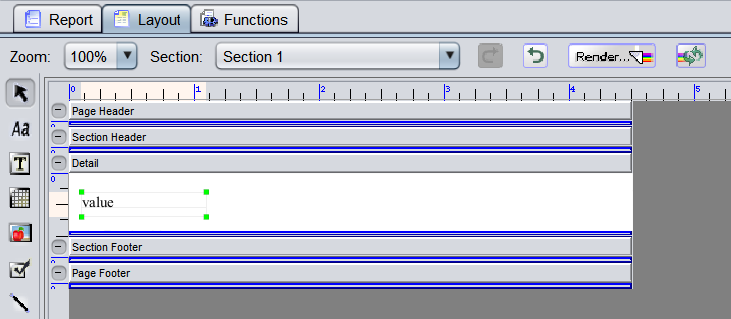
Step 7: Add Data Field
Insert a Data Field element into your report template. Select the data you want to present from the chosen datasource.
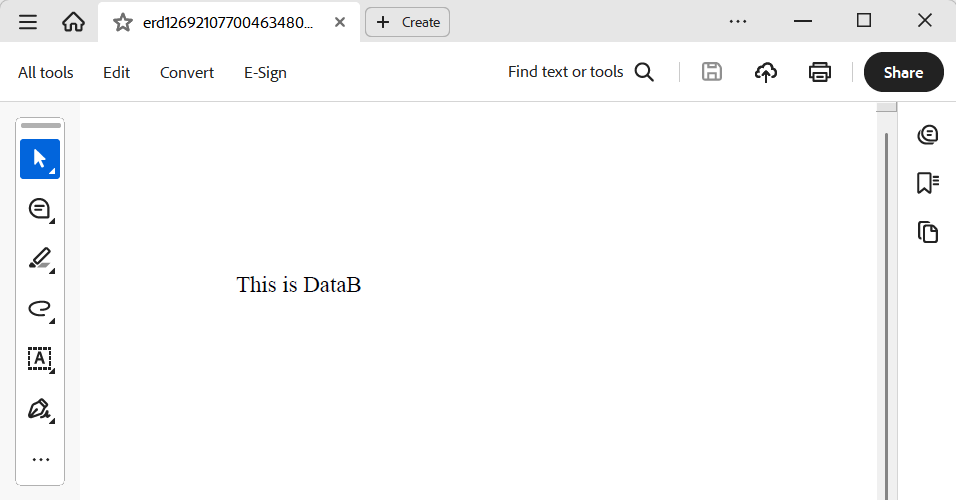
Step 8: Save & Verify
- Save the
.rmlfile after configuration. - Render the report in preferred format.
- Use the
DataChoicedropdown to select betweenDataAandDataB. - Confirm that the report switches datasources correctly at runtime.
Attachments
- Datasource Samples
- RML Template Example
DatasourceOptions.zip (4.7 KB)